For my animation project I wanted to create something with a narrative that could be told in an unusual manner and make it quite cinematic with a variety of camera angles and shot types to give it a film like feel.
This animation made with Tom Roberts (http://thomasmroberts.blogspot.com/) was an experimentation with depth of field and layers to have a character move from the background to the foreground of a scene smoothly.
The first test of my final animation with a character falling through a vertical environment that has initial camera angles intended to build up to them falling. My intention is to incorporate more characters on his descent that the person passes by to add more emphasis to the depth of field and have a much more dramatic conclusion with timings for areas being improved for maximum effect.

Sunday 27 November 2011
Saturday 5 November 2011
Interaction Brief and Thoughts
Task: Create a interactive space using digital stills and HTML/CSS which visitors can explore.
After looking at this brief my first step was to research existing examples of this medium, particularly for the way navigation had been incorporated and the objective of the whole interactive space.
Some examples like the ones below taken from Youtube, had a video setting the situation followed by a multiple choice option that redirected to the appropriate video down that selected path with it, depending on the storyline, ending in success or failure leaving the other routes open to attempt.
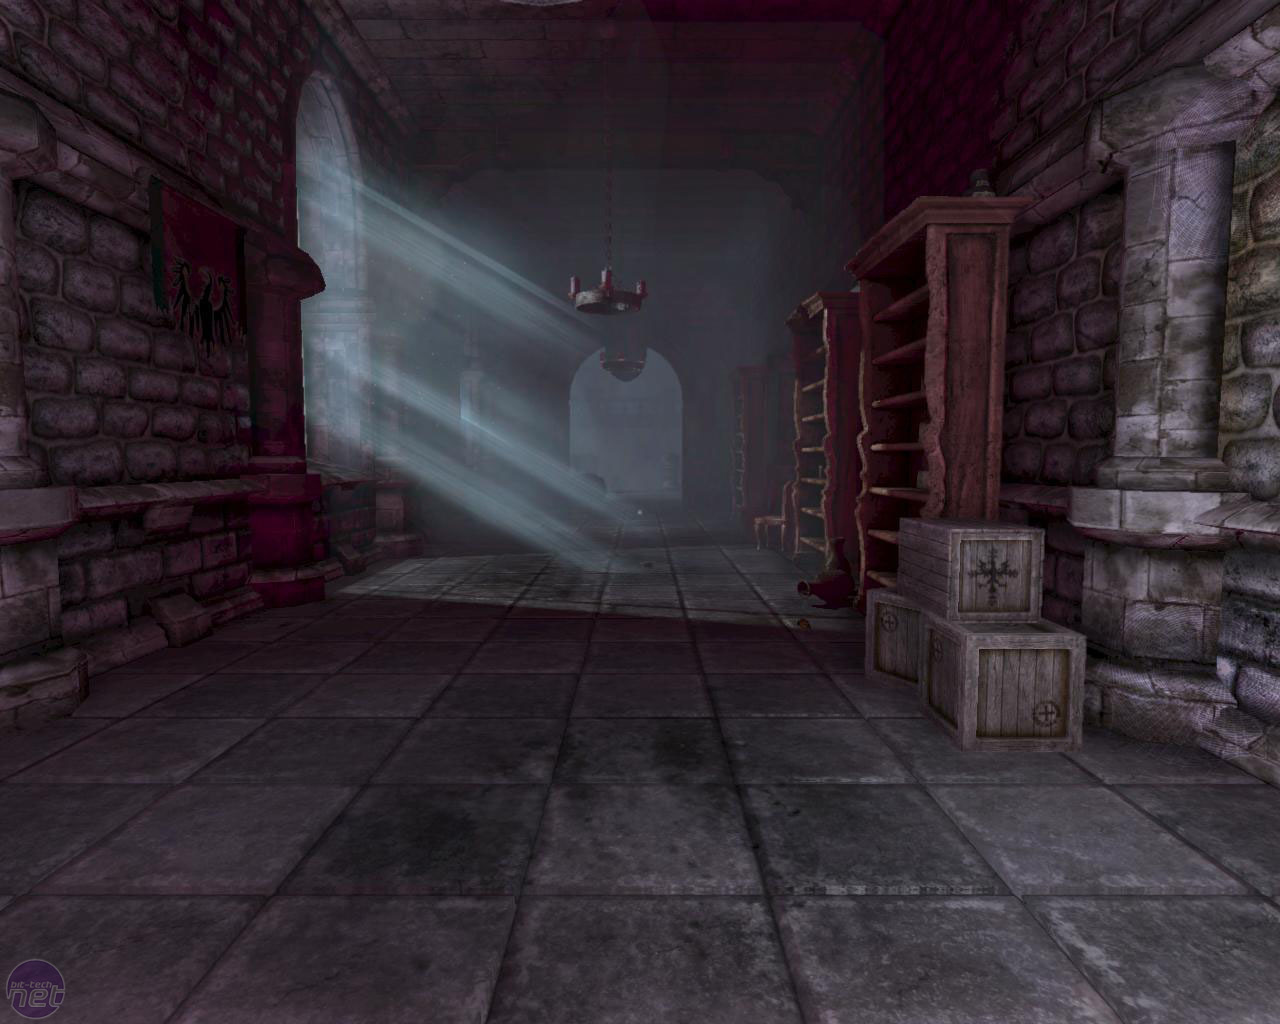
I have decided to base my interactive space on a 'dungeon crawler' type experience with the end target being to reach the treasure situated within the environment. All of my digital images will be made in Adobe Illustrator and Photoshop as I believe this will give me the most freedom to produce a suitable looking environment that matches my intentions. I looked at a variety of games based in a dungeon environment as well as things that could act as puzzles or obstacles throughout the adventure as well as researching old text based adventure games such as Zork that had simple typing interfaces to explore an imaginary environment with a lot of options being accounted for.
Dungeon and Dragons and was also something I considered when designing my dungeon environment as I wanted to add an element of chance into my adventure, however could not find a possible solution to this with my knowledge of HTML.
Amnesia: The Dark Descent was one game I looked at as a features a variety of puzzles and challenges that I thought I could incorporate as well as having a dark castle setting that I wanted to base my digital stills on.


Another game I looked at was a turn-based game called Dungeons of Dredmor. The reason I looked at this was to get an idea of a dungeon type environment in a low graphic format. Also I looked at this because the turn based element of it meant it was easy to get an understanding of options that could be given to a user such as movement, attacking or using an item.


After looking at this brief my first step was to research existing examples of this medium, particularly for the way navigation had been incorporated and the objective of the whole interactive space.
Some examples like the ones below taken from Youtube, had a video setting the situation followed by a multiple choice option that redirected to the appropriate video down that selected path with it, depending on the storyline, ending in success or failure leaving the other routes open to attempt.
I have decided to base my interactive space on a 'dungeon crawler' type experience with the end target being to reach the treasure situated within the environment. All of my digital images will be made in Adobe Illustrator and Photoshop as I believe this will give me the most freedom to produce a suitable looking environment that matches my intentions. I looked at a variety of games based in a dungeon environment as well as things that could act as puzzles or obstacles throughout the adventure as well as researching old text based adventure games such as Zork that had simple typing interfaces to explore an imaginary environment with a lot of options being accounted for.
Dungeon and Dragons and was also something I considered when designing my dungeon environment as I wanted to add an element of chance into my adventure, however could not find a possible solution to this with my knowledge of HTML.
Amnesia: The Dark Descent was one game I looked at as a features a variety of puzzles and challenges that I thought I could incorporate as well as having a dark castle setting that I wanted to base my digital stills on.
Another game I looked at was a turn-based game called Dungeons of Dredmor. The reason I looked at this was to get an idea of a dungeon type environment in a low graphic format. Also I looked at this because the turn based element of it meant it was easy to get an understanding of options that could be given to a user such as movement, attacking or using an item.
Tuesday 1 November 2011

Sunday 30 October 2011


Thursday 27 October 2011
Filmmaking- Initial Ideas Continued
Project Brief Idea 3
Interviewee speaks incoherently because of having a thick accent/being drunk/talking fast meaning the interviewer has a difficult time understanding what is being said causing the flashback scene to be confusing and disorganized as the interviewer catches small phrases or words of the conversation.
- Inspired by Hot Fuzz Incoherent Farmer Scene: http://www.youtube.com/watch?v=M5NuPI7pK2s&feature=related
- Disorganized Flashback
-Interviewer pieces together a scene from what words and phrases he understands from the interviewees explanation.
- Mumbled speech with certain words said clearer to direct the flashback scene.
- Flashback scene through perspective of an onlooker rather than the interviewee to represent their statement not being understandable.
- Interviewers facial expressions convey his confusion towards the interviewee.
Filmmaking- Initial Ideas
Project Brief Idea 1
Interviewee keeps giving ridiculous explanations for how the woman's shoe was stolen e.g. aliens, an animal, etc, but still claims they know what happens after each is rejected by interviewer.
- Wants credit for aiding the investigation, but has no idea what actually happened.
-Interviewer becomes more skeptical as each explanation is given.
- Multiple Flashbacks
-Interviewer interrupts flashbacks, stating the fact the statement is silly.
-Flashbacks with interviewee's voiceover that follows what they are saying.
-Flashbacks different pace to normal scene with interview.
-Sudden elements are added to flashback as interviewee 'remembers' them.
Project Brief Idea 2
Interviewee keeps staring at the camera and smiling because of the attention making out they are successful and wealthy, whilst focusing more on them during the flashback rather than the woman.
- During flashback camera pans off of woman/ event being told, instead going to what the interviewee is doing.
-Camera more centered on interviewee.
- When talking, interviewee keeps glancing at the camera and smiling.
Filmmaking- Research 2
The Black Hole
-Dull Setting, Grey (shows characters feelings)
-Variety of camera angles
-Sound effects add to setting, playing repetitive sound when interacting with hole, gets louder at end as he climbs further inside (builds tension)
-Camera angle from inside hole- explains whats happened
-Character starts by having fun/ doing a trick (relate-able, audience can understand feeling)
-Facial expression changes to evil/ darker showing intent, going too far
-Eating the chocolate bar shows greed, implies outcome
-Character sees vending machine/ locked door before audience (close-up of face shows his emotion)
-Continuous beeps/ photocopier sounds throughout, used as final sound
Filmmaking- Research 1
Where's the Money Ronnie?
-Close-up camera shot for interviews.
-Top and bottom of heads cut off.
-No sound in flashbacks (spoken over or music).
-Different speeds for flashback (slightly faster paced than interview scenes most of the time).
-Interviewees not looking into the camera most of the time. Appears to be talking to 2 or 3 people with camera acting as one and the others sitting next to the camera, similar to an interview situation.
-Interviewer heard only briefly asking questions.
-Interviewers voice distant/not as clear/ muffled.
-Text graphic to introduce character
-Flashbacks filmed with handheld camera (shaky, fast paced).
-Some sections with long shots or mid shots with camera on tripod (shows scene/ setting/ multiple events).
Tuesday 25 October 2011
Filmmaking - The Finished Article
With my film finished it is time to reflect on how this project went and more importantly what went wrong.
Since starting this course I was never that keen on film as the field I would specialise in and after this project I believe that opinion remains. As much as I enjoy editing and seeing the final piece for me to admire, I always find the journey there tedious and a struggle that leaves me exhausted and glad afterwards that it's over, rather than being proud of what I have done. I like tweaking with details of the compiled footage to improve it and add the effects that make it complete, but in my personal experience, whenever a group film project has arisen, mainly involving filming equipment, I have found it to be disorganised and true to my opinion of film, however this could be more down to my own shortcomings rather than that of the film project in general.
But enough of ranting, time to evaluate what happened in detail...
Filmmaking- Beast of the Bench from Nick Rood on Vimeo.
When working on this project there were a few issues my group faced that meant compromises had to be made during the filming process. Aquiring actors was a key problem as all possible candidates were unavailable during our filming period meaning some of our group members had to step in to play the roles in our interview sequence.
Other unforeseen issues such as delays and illness caused problems on the day of filming meaning our window for shooting was closed substantially, requiring us to film on multiple days at different time periods. This had its own issue of the footage we collected having different lighting and colour tones that had to be resolved during editing using the colour balance tools.
Audio quality was a problem as there was a high quantity of background noise such as wind or vehicles in the distance as well as our actors audio levels changing noticeably when shooting from a second angle or at a different location. This was easy to fix however using some of the audio effects suring editing to reduce background noise and increase the volume of certain scenes.
When editing my scene I had difficulty because of the limitation on shot variety we had because of issues on the day of filming, however with the footage I had I believe I was able to produce a good final piece with some of the choices I made. In particular during the end of the flashback scene I chose to have an instant cut from the first person perspective of the 'beast' to our interviewee grabbing out as he describes what it was doing, as I found this a good way to finish after building the tension with the slow flashback with an atmospheric music track.
Overall I am pleased with my finished edit, however would have hoped to produce a higher quality piece of work for my first university project although I would still be keen to improve on it at a later date as, even though I am personally not interested in the film aspect of this course, I would still want to better my understanding and abilities in it for future use.
Now to get started on interaction.
Sunday 23 October 2011
Rule Of Thirds
The Rule of Thirds applies to the location of elements within an image and states that, when splitting up an image into a 9x9 grid, key points of interest should be placed on the points of intersection where they act as the main area a viewer would focus on. This rule is used in a number of different fields with a few being photography and where to position the important subjects in an image, as well as film and where characters or main plot elements should be placed to maintain the audiences focus.
Thursday 13 October 2011
Short Film Plot- First Draft
First draft of the film plot from the film-making project.
After being confronted by a woman claiming to have had her shoe stolen while napping, a pair of police officers head to the scene of the crime, the Nottingham Arboretum, where they approach a passerby to interview them on their knowledge of the event.
Before getting chance to give her description of the events an (elderly/slightly crazy?) man interrupts approaching the police, retelling what he thinks happened on the day.
His tale speaks of a vicious beast with sharp teeth and a terrifying growl, a beast that had stole his own shoe earlier. (Camera looks down at mans shoes, both being there, for man to explain he put some others on). The man goes on to lament about his own personal problems and how he is terrorized by the creature whenever he visits the park, but is snapped out of going into a flashback by the interviewer who asks him to tell them what happened to the woman.
It enters into a flashback seen from the point of view of the ‘beast’ whilst the man explains what he saw, rummaging around in bins and sniffing along the ground as it slowly approaches the woman’s sleeping body and the shoe dangling off of her foot, ending just as it is about to grab the shoe.
After returning from the flashback the interviewer then asks for a description of the ‘beast’ to which the man replies: 1 foot tall, furry, makes a sort of barking sound when angry and has a collar saying- Rex? (Dog name).
The interviewer realizes the man has been talking about a dog the entire time and then asks the man if he knows it’s a dog, which he does and thinks it’s a horrible animal, as he has a fear of them.
The police leave the man standing there alone as he shouts to them to help him rid the place of the dog, before hearing a bark and running off screen.
Wednesday 12 October 2011
3D and Zombies
Me being very interested in 3D animation I stumbled upon this short trailer for a possible future film adapted from a comic book series called 'The Goon' and thought I would share it with everyone else.
I love the graphic styling of this animation and combined with the humour and 'camera work' it makes for a great scene as well as the lighting giving real depth to it all. However, I personally am more interested in the tools and software they used to produce the 3D models and animate them as I would hope to one day produce something half as good as this.
So time to research more into 3D animation and I will return with my results and hopefully a basic example to show off.
Wednesday 5 October 2011
My Design Process
When working on a project I normally begin by researching relevant materials and looking at similar existing work followed by some preliminary sketches on the basic concept I want to achieve.
Following this I develop my original idea into further sketches exploring different routes I could take and continuing to look at the reference material I had gathered earlier incorporating elements I deem suitable into my own design.
After I have developed my idea into something I am pleased with I move on to produce a basic design on the relevant software, depending on the project. If necessary I will also consult any online tutorials for any useful techniques that could be utilized in the production of my work.
Once this is done I shall follow the same development steps I had taken during sketching, this time taking advantage of the software’s tools to further refine my work and keep improving on my original design.
Again after having a piece I am pleased with I go on to receive feedback from a number of sources, which I then take into account and incorporate to improve my work. I then repeat this stage of building on my work and receiving feedback until I produce my finished product.
One thing I find very important throughout my design process is taking regular breaks to allow me to clear my head and get a fresh perspective on my work when returning, meaning I can come up with several ideas on how to go about the same thing.
Usually when looking back at previous work, I do so to remember a certain process I took when creating something or to utilize a technique I had used previously in a way that will produce a different outcome.
Sunday 2 October 2011
Pirate Graphic

Sunday 25 September 2011

Friday 16 September 2011
An NTU Multimedia Graduate
The work of Robert Antill who graduated Nottingham Trent University in 2010 is something that really appeals to me as he produces a variety of work using different tools, which can all be found on his website: (http://www.digitalanthill.com/). He works for a design agency in Nottingham called Tribe (http://www.tribeuk.co.uk/) where his role as Multimedia Producer is to create a variety of works for a number of clients along with his team.
During my studies at NTU I hope to be able to achieve a goal where I am able to maintain a portfolio of varying works and advance my abilities, producing work of a similar style to that of Robert's.
Prior to studying at NTU I was on a Multimedia course at NCN City where, with the assistance of my tutors I was able to produce a variety of work in different fields of Media e.g. animation, photography, 3D modelling etc.
These are just a couple of examples of the work that I produced during my time at college:

The animation I was especially proud of because it was a project that I worked on with one of my fellow students, making it more enjoyable and good experience of working with someone else and sharing the work load.
During my studies at NTU I hope to be able to achieve a goal where I am able to maintain a portfolio of varying works and advance my abilities, producing work of a similar style to that of Robert's.
Prior to studying at NTU I was on a Multimedia course at NCN City where, with the assistance of my tutors I was able to produce a variety of work in different fields of Media e.g. animation, photography, 3D modelling etc.
These are just a couple of examples of the work that I produced during my time at college:

Pixel Art
Kinetic Typography Animation
Friday 9 September 2011
Furniture Set


Silo 3D
I recently tested out a software I'd found called Silo 3D. Looking at videos and examples of work produced using it, I downloaded a 30 day trial, which I used to produce a few basic character and environment models.
After playing around with the tools a bit I started to really enjoy using it because I found it very simple to make something quickly at my current level of 3D ability and was able to practice a couple of different techniques in character creation- specifically box modelling, which being something I had not tried, was very easy to get to grips with and I was amazed at the simplicity in which I could alter an entire section of a model using the 'soft selection' tool.
By practicing with this software i was also able to find out about a few issues that can occur in character modelling and methods used to avoid them such as using only 4-sided shapes (quads) on each face, making it easier for them to be altered. Non-manifold geometry was something that I came across after making an error on one of the sections of my character which caused large spikes to be produced when subdividing it, which acted as an indicator of where the issue is. With a short period of research I was able to discover the cause and fix it simply using a combination of tools on the software.
I understand that most 3D software share the same or similar tool sets that might just be named differently or have a slightly different purpose, however I found Silo 3D the easiest to use for what I wanted to do.
Subscribe to:
Posts (Atom)